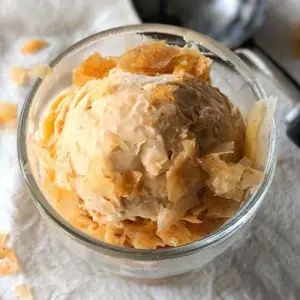
Salted Caramel Ice Cream
Enjoy a velvety, sweet, and slightly salty homemade ice cream with minimal effort. No ice cream machine is required, making this dessert perfect for busy days, summer afternoons, or a quick homemade treat. Just mix, fold, and freeze to savor a rich, creamy delight in a few hours.
Equipment
- 1 large mixing bowl
- 1 hand whisk or handheld mixer
- 1 spatula for folding
- 1 freezer-safe tub or container
Ingredients
- 300 g double cream
- 200 g tinned caramel
- 1 tsp sea salt flakes
Instructions
- Prepare the Cream Base: Pour the double cream into a large, clean mixing bowl. Make sure the bowl is wide enough to allow for easy whisking. Using a hand whisk or handheld electric mixer, begin whipping the cream gently on a low setting, gradually increasing speed. Whipping the cream first ensures a light, airy texture that will make your ice cream luxuriously smooth.
- Incorporate the Caramel: Measure the tinned caramel carefully and add it to the whipped cream. Use a spatula or the whisk to fold the caramel into the cream slowly. Take your time to combine the two ingredients thoroughly, creating a silky, uniform mixture with no streaks. This step is essential to ensure every spoonful is perfectly caramel-flavored.
- Whisk to Soft Peaks: Continue whisking the cream and caramel mixture until soft peaks form. Soft peaks mean the cream will hold its shape lightly but will still gently fall when the whisk is lifted. This stage is critical for achieving a creamy, smooth texture in the finished ice cream, avoiding a heavy or icy consistency.
- Add the Salt: Sprinkle the sea salt flakes evenly over the cream and caramel mixture. Use the spatula to fold the salt in gently. Folding rather than stirring preserves the airy texture you’ve created, while the salt enhances the caramel flavor, balancing the sweetness and adding a sophisticated, slightly savory note.
- Transfer to Freezer Container: Choose a freezer-safe tub or container with a tight-fitting lid. Carefully transfer the ice cream mixture into the container, using the spatula to scrape every bit from the bowl. Smooth the surface with the spatula to create an even layer, which helps the ice cream freeze consistently.
- Freeze Until Ready: Place the container in the freezer on a level surface. Allow it to freeze for at least 2–3 hours or until firm. No churning or stirring is required during freezing, making this recipe exceptionally simple. The ice cream will set into a rich, creamy texture, ready to serve straight from the freezer.
- Serve and Enjoy: When ready to enjoy, remove the ice cream from the freezer. For easier scooping, let it sit at room temperature for 3–5 minutes. Use a warm ice cream scoop or spoon to create generous portions. Serve in bowls or cones, and optionally sprinkle a few extra salt flakes on top for an elegant finish.
- Optional Presentation Tips: Garnish with caramel drizzle, crushed nuts, or chocolate shavings to elevate your dessert visually and texturally. This step is optional but adds a professional touch and makes your homemade ice cream feel special for guests or family treats.
Notes
- Use high-quality double cream for the richest, creamiest texture.
- Ensure the caramel is smooth and soft; if it’s slightly hard, warm gently before mixing.
- Folding the salt in gently preserves the airy texture of the cream.
- No churning required—this is a simple, no-fuss recipe ideal for quick homemade desserts.
- The ice cream is best eaten within one week for optimal flavor and texture.
- Optional add-ins: crushed nuts, chocolate chips, or caramel drizzle for added texture and flavor.
