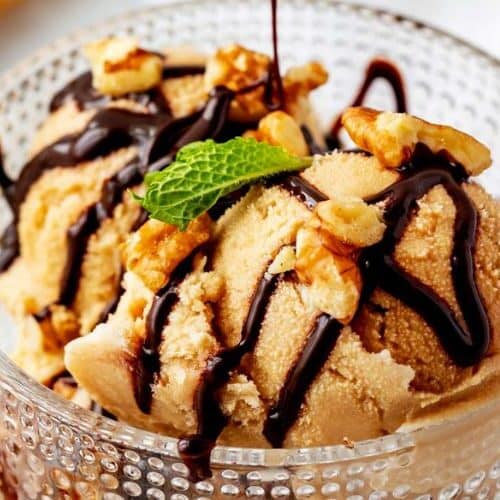
Ninja Creami Coffee Ice Cream
Ninja Creami Coffee Ice Cream is a decadent and creamy homemade treat for coffee lovers. This ice cream uses the Ninja Creami machine to create a smooth, rich texture with the bold flavor of brewed coffee. With just a few simple ingredients, you can enjoy a gourmet dessert that rivals store-bought options, all from the comfort of your home. Whether you prefer it plain or with your favorite mix-ins, this ice cream is perfect for satisfying your sweet and coffee cravings.Nutrition Facts (Per Serving):Calories: 350 kcal, Total Fat: 24g, Saturated Fat: 14g, Cholesterol: 70mg, Sodium: 35mg, Total Carbohydrates: 33g, Dietary Fiber: 1g, Sugars: 30g, Protein: 4g, Vitamin A: 12% DV, Vitamin C: 0% DV, Calcium: 10% DV, Iron: 4% DV
Equipment
- Ninja Creami Machine: 1 unit
- Mixing Bowls: 1 large
- Measuring Cups (1 set)
- Measuring Spoons (1 set)
- Coffee Maker (optional): 1 unit
- Freezer: 1
Ingredients
- 2 cups 480 ml Whole Milk
- 1 cup 240 ml Heavy Cream
- 3/4 cup 150 g Granulated Sugar
- 1 cup 240 ml Brewed Coffee (or espresso for a stronger flavor)
- 1 tsp Vanilla Extract
Optional Add-ins:
- 1/4 cup 40 g Chocolate Chips
- 1/4 cup 30 g Crushed Nuts (walnuts, almonds, or hazelnuts)
- 1 tbsp Coffee Liqueur optional
Instructions
- Prepare the Coffee Base: Brew a strong cup of coffee or espresso. In a mixing bowl, combine the brewed coffee, sugar, vanilla extract, and heavy cream. Whisk everything together until the sugar is fully dissolved and the mixture is smooth.
- Chill the Base: Refrigerate the mixture for at least 2 hours to allow it to chill thoroughly.
- Freeze the Mixture: After chilling, pour the mixture into the Ninja Creami pint container. Ensure the base is evenly spread. Place the container in the freezer and let it freeze for at least 24 hours.
- Process the Ice Cream: Once the base is frozen solid, remove it from the freezer and place it in the Ninja Creami machine. Use the "Ice Cream" setting to churn the mixture into a creamy texture.
- Add Mix-ins (Optional): After processing, you can add mix-ins like chocolate chips or nuts. Stir them into the ice cream or run the “Mix-ins” program to incorporate them evenly.
- Serve and Enjoy: Serve immediately or transfer to an airtight container for later storage. If storing, let the ice cream sit out for a few minutes to soften before scooping.
Notes
- Coffee Flavor: For a stronger coffee flavor, use espresso or a dark roast coffee.
- Chilling: Be sure to chill the base mixture for a few hours before freezing. This ensures a smooth, consistent texture when processed.
- Freezing Time: Allow the ice cream to freeze for at least 24 hours before using the Ninja Creami machine. The longer it freezes, the creamier the result.
- Customizing: Feel free to experiment with different mix-ins like chocolate chunks, caramel swirls, or even a touch of cinnamon for added flavor.