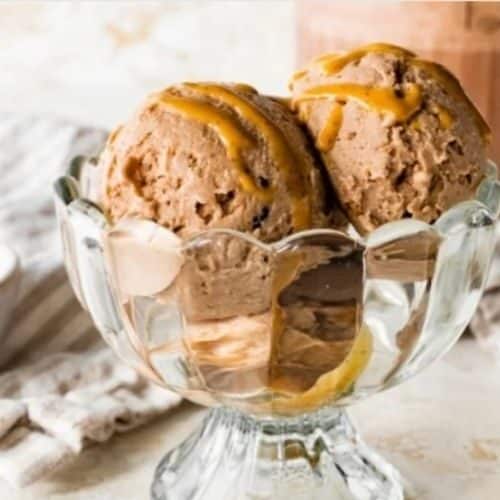
Ninja Creami Chocolate Peanut Butter Ice Cream
Indulge in the perfect blend of rich chocolate and creamy peanut butter with this Ninja Creami Chocolate Peanut Butter Ice Cream. This homemade treat is smooth, decadent, and incredibly easy to make. With just a few simple ingredients and the power of the Ninja Creami, you can create a creamy, nutty, and chocolatey delight that rivals store-bought ice cream. Perfect for peanut butter lovers and chocolate enthusiasts alike!Nutrition Facts (Per Serving)Serving Size: 1/4 of the recipe ,Calories: 300 kcal ,Total Fat: 18g ,Saturated Fat: 6g ,Cholesterol: 10mg ,Sodium: 150mg ,Total Carbohydrates: 28g ,Dietary Fiber: 2g ,Sugars: 22g ,Protein: 7g ,Calcium: 90mg ,Iron: 1.5mg ,Potassium: 280mg
Equipment
- 1 Ninja Creami Machine
- 1 Ninja Creami Pint Container with Lid
- 1 medium mixing bowl
- 1 Whisk
- 1 Measuring Cup Set
- 1 Measuring Spoon Set
Ingredients
- 1 cup 240 ml whole milk (or heavy cream for extra richness)
- 2 tablespoons unsweetened cocoa powder
- ¼ cup 50 g granulated sugar (or sugar substitute)
- ⅓ cup 85 g creamy peanut butter
- ½ teaspoon vanilla extract
- Pinch of salt
- 1 –2 tablespoons as needed milk or cream (for re-spin, optional)
Optional mix-ins: Chocolate chips, crushed peanuts, or peanut butter swirls
Instructions
Step 1: Make the Ice Cream Base
- In a medium mixing bowl, whisk together whole milk, cocoa powder, sugar, and salt until fully combined and smooth. The cocoa may take a moment to dissolve, so continue whisking until no lumps remain.
- Add vanilla extract and peanut butter, stirring until the mixture is creamy and well-blended.
Step 2: Freeze the Mixture
- Pour the ice cream base into a Ninja Creami pint container, ensuring it doesn’t go past the max fill line.
- Seal the container with its lid and place it in the freezer for 12–24 hours, allowing it to harden completely.
Step 3: Process in the Ninja Creami
- Remove the frozen pint from the freezer and place it into the Ninja Creami machine.
- Lock the outer bowl into position and select the “Ice Cream” function to process the mixture until smooth and creamy.
Step 4: Re-Spin If Necessary
- After processing, check the consistency. If it appears crumbly, add 1–2 tablespoons of milk or cream, then select the “Re-Spin” function to achieve a smoother texture.
Step 5: Add Mix-Ins (Optional)
- If you’d like mix-ins such as chocolate chips, crushed peanuts, or peanut butter swirls, create a small well in the ice cream, add them in, and use the “Mix-In” function to blend them evenly.
Step 6: Serve and Enjoy
- Scoop the ice cream into bowls or cones, drizzle with extra peanut butter or chocolate sauce, and enjoy immediately!
- For leftovers, store in the sealed Ninja Creami pint container in the freezer. Let it sit at room temperature for 5–10 minutes before serving again.
Notes
- For a dairy-free version, use full-fat coconut milk or almond milk instead of whole milk.
- For a sugar-free alternative, swap granulated sugar with monk fruit sweetener, erythritol, or allulose.
- For a richer texture, use heavy cream instead of whole milk.
- Re-spin tip: If the ice cream is too firm after freezing, adding a little milk and re-spinning can make it creamier.
- Customize your mix-ins! Try crushed Oreos, caramel swirls, or a sprinkle of flaky sea salt for extra indulgence.