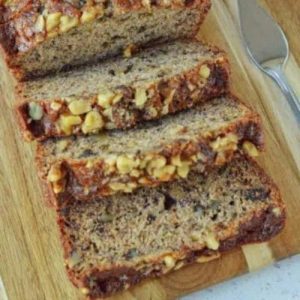
Banana Nut Bread
This moist banana nut bread combines sweet ripe bananas with crunchy walnuts for a tender loaf that’s both delicious and nourishing. Packed with fiber, plant-based protein, and healthy fats, it’s perfect for breakfast, snacks, or sharing with friends. Quick to prepare and oven-ready in just 10 minutes, this recipe delivers a satisfying treat every time.
Equipment
- 1 x 9x5-inch Loaf Pan
- 1 × Mixing bowl (medium)
- 1 × Mixing bowl (large)
- 1 × Whisk
- 1 × hand mixer or stand mixer
- 1 × rubber spatula
- 1 × Cooling rack
- 1 x Measuring Cups and Spoons
- 1 × nonstick baking spray or brush for greasing
Ingredients
- 1 ½ cups all-purpose flour
- 1 teaspoon baking soda
- ½ teaspoon ground cinnamon
- ¼ teaspoon salt
- ½ cup unsalted butter softened
- ¾ cup granulated sugar
- 2 large eggs room temperature
- 2 cups ripe bananas mashed (about 4 medium bananas)
- 1 teaspoon vanilla extract
- ¾ cup walnuts or pecans chopped
Instructions
- Prepare the Oven and Pan: Begin by preheating your oven to 350°F (175°C). This ensures the oven is at the right temperature by the time your batter is ready to bake, which is key for even rising. While the oven heats, take a 9×5-inch loaf pan and either grease it generously with butter or spray it with nonstick baking spray. For extra insurance against sticking, you can also line the pan with a strip of parchment paper, leaving some overhang on the sides to help lift the bread out later.
- Mix the Dry Ingredients: In a medium mixing bowl, combine 1 ½ cups of all-purpose flour, 1 teaspoon baking soda, ½ teaspoon ground cinnamon, and ¼ teaspoon salt. Use a whisk to evenly blend these dry ingredients, breaking up any clumps of flour and ensuring the baking soda and cinnamon are well distributed. This step prevents uneven flavor pockets and helps the bread bake uniformly. Set the bowl aside once everything is well mixed.
- Cream Butter and Sugar: In a large mixing bowl, add ½ cup softened butter and ¾ cup granulated sugar. Using either a stand mixer fitted with the paddle attachment or a hand mixer on medium speed, beat the mixture until it becomes light, smooth, and fluffy. This process should take about 2–3 minutes. Creaming incorporates air into the batter, which gives the bread its tender and moist texture.
- Incorporate the Eggs: Reduce the mixer speed slightly to medium-low, then crack in 2 large room-temperature eggs, adding them one at a time. After adding the first egg, beat until fully incorporated before adding the second. This prevents the mixture from curdling and helps create a smoother batter. The eggs add structure and richness to the bread, so be sure they’re mixed in thoroughly before moving on.
- Add Mashed Bananas and Vanilla: Now, take your 2 cups of mashed ripe bananas (about 4 medium bananas) and add them to the butter-egg mixture. Pour in 1 teaspoon vanilla extract as well. Continue mixing on medium-low until the bananas are fully incorporated. At this stage, the batter may look slightly lumpy, which is completely normal. Those bits of banana will contribute to the bread’s moistness and natural sweetness.
- Combine Wet and Dry Mixtures: Lower the mixer speed to low or switch to mixing by hand with a spatula. Slowly add the dry flour mixture into the wet banana mixture, about ½ cup at a time. Mix just until the flour disappears into the batter. Be careful not to overmix here—stirring too much can overdevelop the gluten, leading to a dense or tough loaf. Stop mixing as soon as everything looks combined and smooth.
- Fold in the Nuts: Using a rubber spatula, gently fold in ¾ cup chopped walnuts or pecans. Stir just until the nuts are evenly distributed throughout the batter. Folding rather than beating ensures the nuts remain whole and the batter keeps its airy texture. If desired, you can also sprinkle a few extra nuts on top of the batter once it’s in the loaf pan for a pretty, bakery-style finish.
- Transfer Batter to Pan: Carefully pour or spoon the batter into your prepared 9×5-inch loaf pan, spreading it evenly with a spatula. Make sure the batter reaches all four corners of the pan for consistent baking. If you like a more rustic appearance, you can gently swirl the top with the spatula to create a textured surface.
- Bake the Banana Bread: Place the loaf pan in the center rack of your preheated oven. Bake for 55–60 minutes, but begin checking around the 50-minute mark. Every oven bakes differently, so test doneness by inserting a toothpick or thin skewer into the center of the bread. If it comes out clean or with just a few moist crumbs (not wet batter), the bread is ready. If the top browns too quickly while the inside is still baking, loosely cover the pan with a piece of aluminum foil to prevent over-browning.
- Cool Before Serving: Once baked, remove the pan from the oven and allow the bread to cool inside the pan for 5–10 minutes. This resting time helps the loaf firm up slightly, making it easier to remove. Afterward, carefully run a knife along the edges of the pan if needed, then invert the bread onto a cooling rack. Let it cool completely before slicing or wrapping—cutting too early can cause the loaf to fall apart or feel gummy.
Notes
- Always use very ripe bananas—the browner and softer, the better. Overripe bananas bring out natural sweetness and give the bread its signature moistness.
- Avoid overmixing the batter once you add the dry ingredients; gentle stirring prevents a dense or tough loaf.
- Begin testing the loaf around the 50-minute mark with a toothpick. Every oven is different, so don’t rely solely on time.
- Allow the bread to cool fully before slicing or wrapping, as cutting too soon can make it crumble.
- Store the bread in an airtight container or wrapped tightly in plastic wrap for maximum freshness.
