All products are selected by our editorial team for quality. If you buy through our links, we may earn a small commission at no extra cost to you.
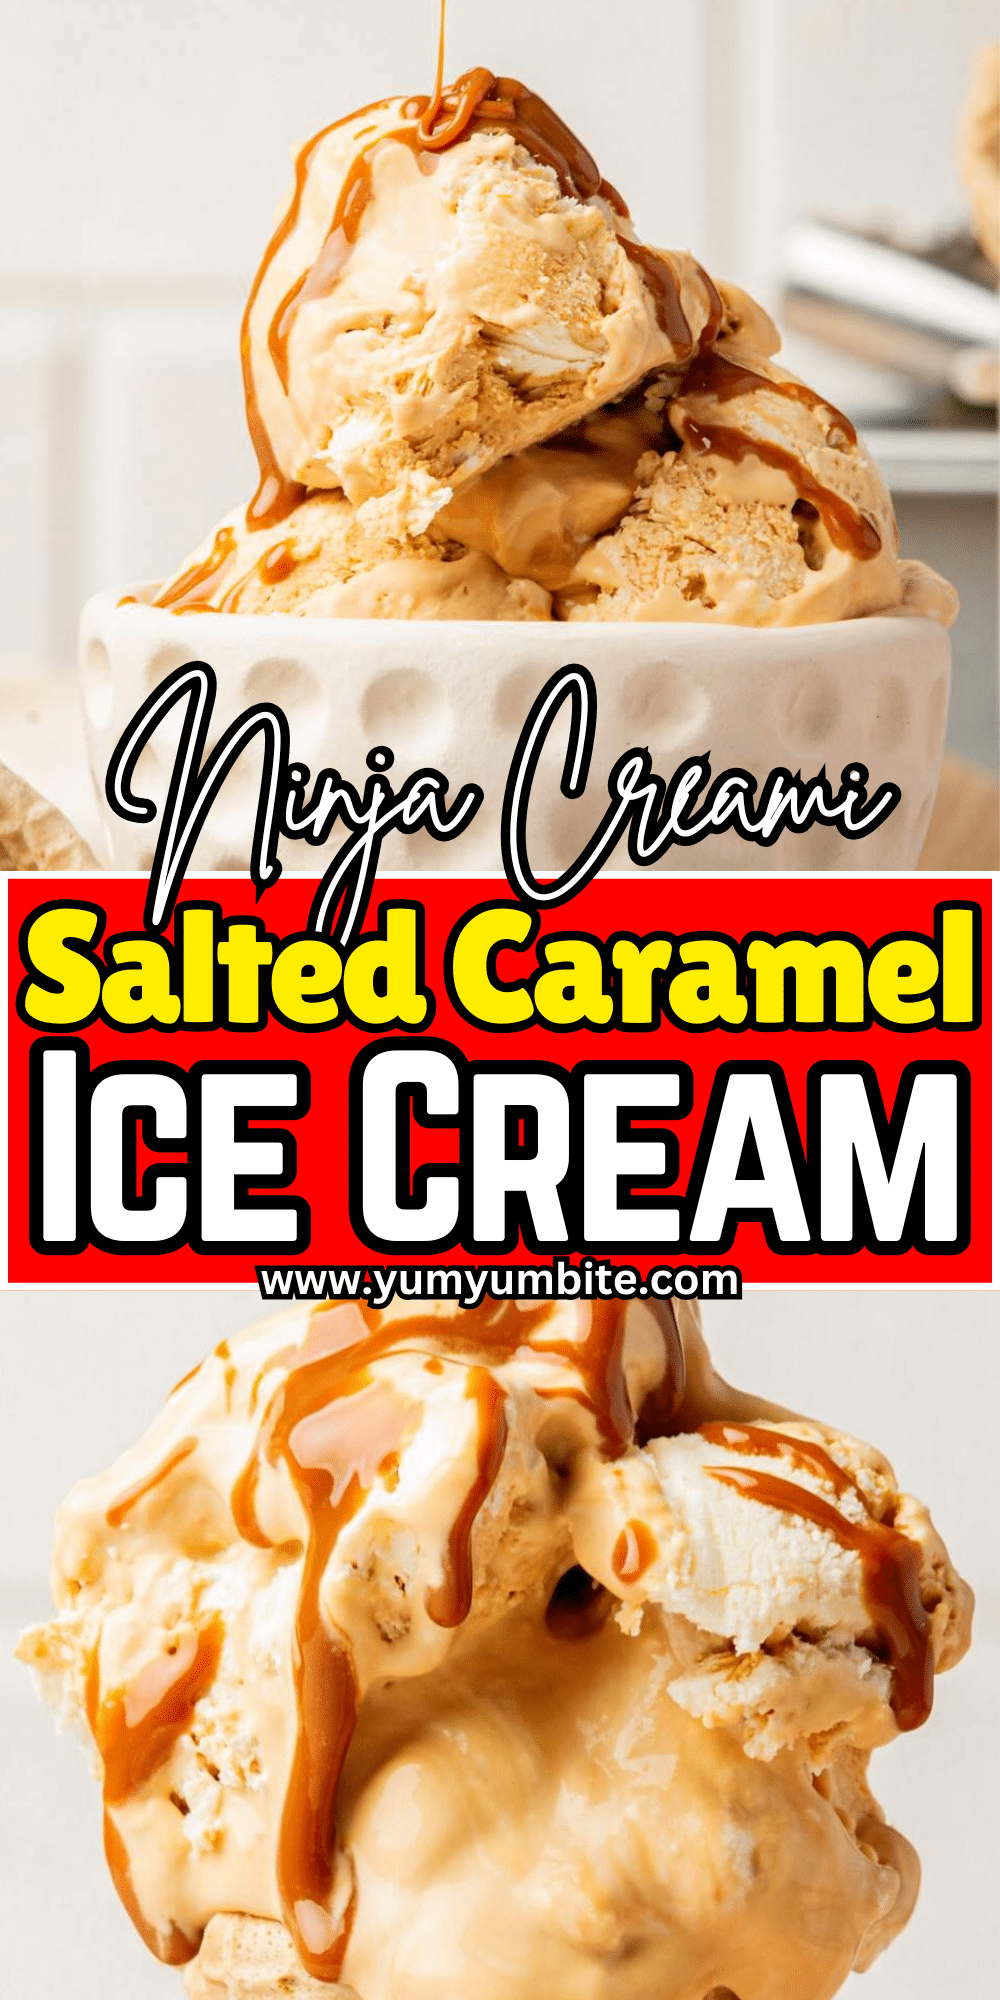
There’s something irresistibly satisfying about the smooth, creamy texture of homemade ice cream, and when it’s infused with the rich, buttery flavor of salted caramel, it becomes pure indulgence.
With the Ninja Creami Salted Caramel Ice Cream, you can bring the decadent taste of a premium dessert right into your kitchen.
This recipe strikes the perfect balance between sweetness and saltiness, with a deep, velvety texture that melts in your mouth.
The beauty of this recipe lies not just in its taste but in its simplicity.
With just a few key ingredients and the magic of the Ninja Creami, you can create an ice cream that rivals anything you’d find at an artisan ice cream shop.
Whether you’re serving it on a hot summer day or enjoying it as a special treat, this salted caramel ice cream is bound to be a crowd-pleaser.
Health Benefits of Ninja Creami Salted Caramel Ice Cream
- Calcium for Bone Health: The combination of whole milk and heavy cream in this recipe provides a good source of calcium, which is essential for maintaining healthy bones and teeth.
- Rich in Healthy Fats: The ice cream contains saturated fats from the cream, which can help provide long-lasting energy when consumed in moderation.
- Mood Boosting: The sweet and salty flavors may trigger a release of endorphins, promoting feelings of happiness and satisfaction. The addition of vanilla extract may also have mild mood-enhancing properties.
- Low in Protein: Although not a primary source of protein, the ice cream does provide a small amount of protein to help with tissue repair and immune function.
Ingredients You’ll Need
To make Ninja Creami Salted Caramel Ice Cream, you’ll need a few basic ingredients.
Don’t worry if you’re new to ice cream making—these are likely items you already have in your kitchen!
Whole Milk: The base of the ice cream, giving it that rich and creamy texture.
Heavy Cream: Adds the luscious, silky smoothness that’s characteristic of high-quality ice cream.
Sugar: Sweetens the ice cream without overpowering the caramel flavor.
Salted Caramel Sauce: You can either make this from scratch (recipe below) or use a store-bought version for convenience. If you decide to make it yourself, you’ll need butter, brown sugar, heavy cream, and sea salt.
Vanilla Extract: Enhances the overall flavor and brings out the sweetness of the caramel.
These ingredients come together to create the perfect ice cream base, one that captures the true essence of salted caramel.
How to Make Salted Caramel Ice Cream with the Ninja Creami
Making Ninja Creami Salted Caramel Ice Cream at home is a simple process that requires just a little patience while your mixture freezes.
Follow these easy steps to achieve that perfectly creamy, salted caramel ice cream.
Step 1: Prepare the Salted Caramel Sauce
Start by making your salted caramel sauce if you’re using homemade caramel.
In a saucepan over medium heat, melt 1/2 cup of butter until it starts to bubble. Add 1 cup of brown sugar and stir constantly until the sugar dissolves.
Slowly pour in 1/2 cup of heavy cream, continuing to stir as the mixture thickens.
After about 5 minutes, remove from heat and stir in 1 teaspoon of sea salt. Let the sauce cool to room temperature.
If you’re using store-bought salted caramel sauce, skip this step and move directly to the next!
Step 2: Make the Ice Cream Base
In a large mixing bowl, combine 2 cups of whole milk and 1 cup of heavy cream. Add 1/2 cup of sugar and whisk until the sugar dissolves completely.
Pour in your cooled salted caramel sauce and 1 teaspoon of vanilla extract, stirring to combine all the ingredients thoroughly. The mixture should have a smooth, uniform texture, with the caramel fully incorporated.
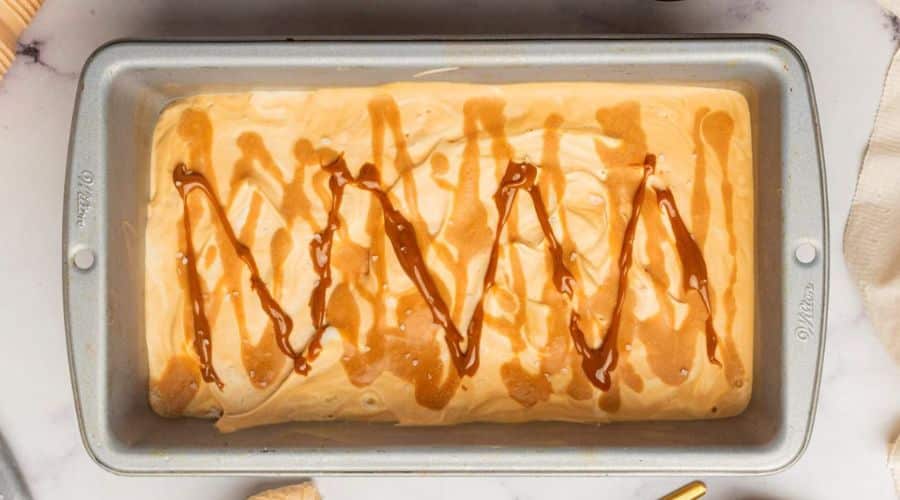
Step 3: Freeze the Mixture
Once the ice cream base is ready, pour it into the Ninja Creami pint container. Ensure that the mixture doesn’t exceed the maximum fill line.
Place the container in your freezer and freeze for at least 24 hours to allow the base to firm up properly.
Step 4: Churn in the Ninja Creami
After freezing, remove the pint container from the freezer and insert it into the Ninja Creami. Select the Ice Cream setting, and allow the machine to churn the mixture into a creamy, dreamy salted caramel ice cream.
The Ninja Creami will do the hard work for you, creating an incredibly smooth texture.
Step 5: Serve and Enjoy
Once your salted caramel ice cream is ready, scoop it into bowls or cones and enjoy immediately!
If you prefer a firmer texture, you can place the ice cream back into the freezer for an additional 20–30 minutes.
Recipe Variation
- Chocolate Salted Caramel Ice Cream: For a chocolate twist, add 1/4 cup of cocoa powder or 1/2 cup of melted dark chocolate to the ice cream base. Mix thoroughly with the caramel sauce before churning.
- Nutty Salted Caramel Ice Cream: Add 1/2 cup of crushed roasted pecans, walnuts, or almonds to the ice cream base. This adds a crunchy texture and enhances the flavor with a nutty richness.
- Vanilla Salted Caramel Swirl: For a simpler variation, make a vanilla ice cream base and swirl the salted caramel sauce directly into the mixture before freezing. This creates a more pronounced caramel flavor with a creamy vanilla background.
- Coffee Salted Caramel Ice Cream: For coffee lovers, add 1 tablespoon of instant espresso or brewed coffee to the milk and cream mixture. This variation combines the deep flavor of coffee with the richness of salted caramel.
Tips for Perfect Salted Caramel Ice Cream
Making salted caramel ice cream at home can be a breeze, but a few tips can ensure your dessert turns out perfectly every time.
1. Use High-Quality Caramel Sauce
The flavor of your ice cream will heavily depend on the quality of your salted caramel sauce.
If you choose to make it from scratch, use good-quality butter and brown sugar for a rich, deep flavor. Alternatively, opt for a premium store-bought caramel sauce that you truly enjoy.
2. Don’t Over-Churn
The Ninja Creami is designed to give you smooth, creamy ice cream, but it’s important not to over-churn the mixture.
Follow the recommended time and check the texture before running the machine for longer, as this can lead to icy or grainy results.
3. Proper Freezing Time
For the best consistency, make sure to freeze the ice cream base for at least 24 hours before churning.
This allows the mixture to firm up properly and ensures you get that velvety smooth texture when it’s done.
4. Add Mix-ins for Extra Texture
While salted caramel ice cream is divine on its own, you can enhance the flavor and texture by adding mix-ins.
Consider tossing in crushed pretzels for a salty crunch or pieces of toffee for extra sweetness.
5. Store Properly for Freshness
After serving, store any leftover ice cream in an airtight container. Be sure to let it sit out for a few minutes to soften before scooping it again.
The ice cream should keep well for up to a week, but freshness is always best when enjoyed within a few days!
How to Serve and Enjoy Your Salted Caramel Ice Cream
There are endless ways to enjoy your homemade Ninja Creami Salted Caramel Ice Cream, and the key is to get creative with your serving ideas.
On Its Own
Sometimes the best way to enjoy this ice cream is simply in a bowl or a waffle cone.
Its creamy, velvety texture paired with the balanced sweetness and saltiness of caramel is an indulgent treat by itself.
In an Ice Cream Sandwich
For a fun twist, create an ice cream sandwich by scooping the salted caramel ice cream between two soft, freshly baked cookies.
Chocolate chip, oatmeal, or even snickerdoodle cookies work wonderfully with the caramel flavor.
With a Warm Dessert
Pair your salted caramel ice cream with warm desserts like apple pie, brownies, or a chocolate lava cake.
The cold ice cream complements the warmth of the dessert, creating a beautiful contrast of temperatures and textures.
Topped with Caramel Drizzle and Nuts
For an added touch, drizzle extra caramel sauce on top of the ice cream and sprinkle with toasted pecans or almonds.
This adds crunch, depth, and extra caramel goodness that takes the ice cream to the next level.
Conclusion
Making Ninja Creami Salted Caramel Ice Cream is an easy and satisfying way to bring a little luxury into your home.
The creamy texture, sweet caramel notes, and the subtle salty twist make every bite an indulgent experience.
With just a few simple ingredients and the help of the Ninja Creami, you’ll have a dessert that rivals any artisanal ice cream shop.
Whether served in a cone, as part of an ice cream sandwich, or paired with a warm dessert, this ice cream is sure to please.
Give it a try and treat yourself to the ultimate frozen dessert experience!
Frequently Asked Questions
1. Can I use a different flavor of caramel for this recipe?
Yes, you can use any caramel flavor that you enjoy, including a vanilla caramel or even a chocolate caramel.
Just ensure that the caramel is salted to maintain the balance of sweet and salty flavors in the ice cream.
2. How do I store leftover salted caramel ice cream?
Store any leftover ice cream in an airtight container in the freezer.
Let it sit out for a few minutes before serving again, as homemade ice cream can harden more than store-bought varieties.
3. Can I make this recipe without the Ninja Creami?
While the Ninja Creami gives you the best texture and consistency, you can still make salted caramel ice cream with a traditional ice cream maker.
Just follow the same recipe, churn according to your machine’s instructions, and freeze until set.
4. Can I make a dairy-free version of this ice cream?
Yes, you can substitute the whole milk and heavy cream with dairy-free alternatives like coconut milk or almond milk.
Be sure to use a dairy-free salted caramel sauce to maintain the flavor.
5. How long does it take to freeze the ice cream?
For best results, freeze the ice cream mixture for at least 24 hours before churning.
This ensures the base is firm enough to churn properly in the Ninja Creami, giving you that perfect, creamy texture.

Ninja Creami Salted Caramel Ice Cream
Equipment
- 1 Ninja Creami Machine
- 1 large mixing bowl
- 1 Whisk
- 1 Saucepan
- 1 Ice Cream Container (compatible with Ninja Creami)
- 1 measuring cup and spoons
Ingredients
- 2 cups 480 ml Whole Milk
- 1 cup 240 ml Heavy Cream
- 1/2 cup 100 g Sugar
- 1 cup 240 ml Salted Caramel Sauce (store-bought or homemade)
- 1 teaspoon Vanilla Extract
Instructions
Step 1: Prepare the Salted Caramel Sauce
- If making the salted caramel sauce from scratch, melt 1/2 cup (115 g) butter in a saucepan over medium heat. Add 1 cup (200 g) brown sugar and stir until dissolved. Gradually add 1/2 cup (120 ml) heavy cream, stirring constantly until the sauce thickens. Stir in 1 teaspoon sea salt and remove from heat. Allow the sauce to cool completely.
Step 2: Make the Ice Cream Base
- In a large mixing bowl, combine 2 cups whole milk and 1 cup heavy cream. Add 1/2 cup sugar and whisk until the sugar is completely dissolved. Stir in the cooled salted caramel sauce and 1 teaspoon vanilla extract. Mix well until fully combined.
Step 3: Freeze the Mixture
- Pour the ice cream mixture into the Ninja Creami pint container. Make sure it doesn’t exceed the fill line. Freeze the container for at least 24 hours or until completely firm.
Step 4: Churn in the Ninja Creami
- Once the mixture is fully frozen, insert the pint container into the Ninja Creami machine. Select the Ice Cream setting and allow the machine to churn the ice cream to a smooth, creamy consistency.
Step 5: Serve and Enjoy
- Scoop the salted caramel ice cream into bowls or cones and serve immediately. If you prefer a firmer texture, place the ice cream back in the freezer for an additional 20–30 minutes before serving.
Notes
- Storage: Store any leftover ice cream in an airtight container in the freezer. Let it sit out for 5-10 minutes before scooping if it becomes too hard.
- Dairy-Free Option: To make a dairy-free version, substitute the whole milk and heavy cream with coconut milk or almond milk. Use dairy-free caramel sauce to maintain the flavor.
- Sweetness Adjustments: You can adjust the sweetness by adding more or less sugar to the base, depending on your preference.