
All products are selected by our editorial team for quality. If you buy through our links, we may earn a small commission at no extra cost to you.
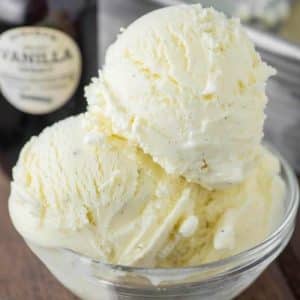
Vanilla Bean Dream Ice Cream is a luxurious homemade dessert that combines the richness of creamy ice cream with the fragrant, authentic taste of vanilla beans.
This ice cream is incredibly smooth and velvety, with the perfect balance of sweetness and vanilla flavor.
It’s a timeless treat that everyone will love, whether enjoyed on its own or paired with your favorite desserts.
Making it at home allows you to experience the full depth of vanilla’s natural flavors, elevating it beyond store-bought varieties.

Health Benefits of Vanilla Bean Dream Ice Cream
Rich Source of Calcium: The heavy cream and whole milk provide calcium, which is essential for strong bones and teeth.
Mood-Boosting Properties: Vanilla has natural compounds that may help reduce stress and promote relaxation.
Good Source of Healthy Fats: The dairy ingredients contain healthy fats that support brain function and hormone regulation.
Protein for Muscle Repair: The egg yolks contribute to protein intake, helping with muscle repair and maintenance.
Antioxidant Properties: Vanilla beans contain antioxidants that help combat oxidative stress in the body.
Why You’ll Love This Vanilla Bean Dream Ice Cream
This Vanilla Bean Dream Ice Cream is made with pure, natural vanilla beans, ensuring a truly authentic flavor that cannot be replicated with vanilla extract.
The rich, creamy texture comes from a custard base made with egg yolks, creating a melt-in-your-mouth experience.
It’s the perfect dessert to enjoy on a hot day or after a delicious meal, and its subtle sweetness makes it versatile enough to pair with other desserts like pies, cakes, or brownies.
Plus, it’s homemade, so you get the satisfaction of crafting something special from scratch, knowing exactly what’s in it!
Ingredients You’ll Need
To make this Vanilla Bean Dream Ice Cream, you’ll need a few simple ingredients that come together to create a rich and creamy dessert. Here’s what you’ll need:
- Vanilla beans: The star of the show! Vanilla beans offer a natural, aromatic flavor that vanilla extract cannot match. You’ll scrape the seeds from the beans for the best taste.
- Heavy cream: This provides the rich and smooth texture that makes homemade ice cream so indulgent.
- Whole milk: A combination of milk and cream helps balance the richness, keeping the ice cream creamy but not too heavy.
- Egg yolks: These create a custard base that adds richness and smoothness to the texture.
- Granulated sugar: For sweetness and to enhance the vanilla flavor.
- Salt: A pinch of salt will elevate the flavors and balance the sweetness.
- Vanilla extract (optional): For an extra touch of vanilla flavor, though it’s optional since you’ll already be using vanilla beans.
These simple ingredients come together to make a delicious and decadent homemade ice cream you’ll want to make again and again!
Step-by-Step Instructions

Prepare the Vanilla Beans
Begin by splitting the vanilla beans lengthwise with a sharp knife. Use the back of the knife to scrape out the seeds from the pods.
Set the seeds aside, and reserve the pods for later use.
Make the Custard Base
In a medium saucepan, combine the heavy cream, whole milk, and granulated sugar.
Place over medium heat, stirring occasionally until the sugar dissolves completely and the mixture begins to steam, but not boil.
Whisk the Egg Yolks
In a separate bowl, whisk the egg yolks until they become light in color.
Slowly add a little of the hot cream mixture into the egg yolks to temper them, whisking constantly to avoid scrambling the eggs.
Gradually add the remaining cream mixture to the eggs, whisking continuously.
Cook the Custard
Return the custard mixture to the saucepan over low heat. Stir constantly with a wooden spoon or silicone spatula, ensuring the custard doesn’t boil.
Cook for 8–10 minutes, or until the mixture thickens and coats the back of the spoon.
You can check by dipping a spoon into the custard and running your finger along the back — if it leaves a clear line, it’s ready.
Infuse with Vanilla
Once the custard has thickened, remove it from the heat and stir in the scraped vanilla beans and their pods (if desired) for extra flavor.
Let the custard cool to room temperature.
Chill the Custard
After the custard has cooled, remove the vanilla pods and transfer the custard to the refrigerator to chill for at least 4 hours or overnight.
The custard must be thoroughly chilled before churning.
Churn the Ice Cream
Once chilled, pour the custard into your ice cream maker and churn according to the manufacturer’s instructions. This usually takes 20–30 minutes.
Freeze to Firm
After churning, transfer the ice cream to a storage container and spread it evenly.
Cover with plastic wrap and then seal with the lid. Freeze for at least 4 hours to firm up the ice cream.
Serve and Enjoy
When ready to serve, scoop out the Vanilla Bean Dream Ice Cream and enjoy the creamy, vanilla-rich delight.
Perfect on its own or paired with your favorite toppings.
Recipe Variation
- French Vanilla Twist: Swap one vanilla bean for an extra egg yolk and add 1 teaspoon of vanilla extract for a richer, more custard-like texture.
- Chocolate Swirl: Gently fold in melted chocolate or chocolate fudge just before freezing for a marbled effect.
- Berry Bliss: Add a swirl of raspberry, strawberry, or blueberry puree during the last few minutes of churning for a fruity contrast.
- Caramel Crunch: Drizzle caramel sauce and fold in crushed toffee or praline for a sweet, crunchy surprise.
- Nutty Delight: Stir in toasted almonds, pecans, or hazelnuts for added texture and a nutty flavor.
- Coffee Infusion: Replace ¼ cup of milk with strong brewed espresso for a vanilla-coffee fusion.
What to Serve with Vanilla Bean Dream Ice Cream
This Vanilla Bean Dream Ice Cream can stand alone as a delicious dessert, but it’s also perfect when paired with other treats. Here are a few ideas:
Fruit Toppings: Fresh berries, sliced strawberries, or a drizzle of warm caramel or chocolate sauce.
Chocolate Desserts: Brownies, chocolate cake, or a fudgy chocolate tart complement the smooth vanilla flavor perfectly.
Pie or Cake: Serve alongside a slice of homemade apple pie, peach cobbler, or lemon cake for a satisfying dessert combo.
Waffle Cones or Crisps: For a classic ice cream experience, enjoy it in a crisp waffle cone or alongside crisp, buttery cookies.
Storage & Meal Prep Tips
Storing: Store your Vanilla Bean Dream Ice Cream in an airtight container for up to 2 weeks in the freezer.
Ensure it’s tightly sealed to prevent ice crystals from forming on the surface.
Meal Prep: The custard base can be made in advance and stored in the refrigerator for up to 2 days before churning.
This makes it easy to prepare the ice cream over a couple of days.
Serving: If the ice cream becomes too firm in the freezer, let it sit at room temperature for 5–10 minutes before scooping for easier serving.
Final Thoughts
Vanilla Bean Dream Ice Cream is a rich, creamy, and indulgent dessert that will satisfy any ice cream lover.
The combination of fresh vanilla beans and a custard base creates a truly luxurious treat.
Whether you enjoy it alone or as part of a larger dessert spread, this ice cream is sure to impress with its depth of flavor and velvety texture.
Plus, making it at home ensures it’s always fresh and full of the good stuff!
Frequently Asked Questions
Can I make this ice cream without an ice cream maker?
Yes, you can! After chilling the custard, pour it into a shallow container and freeze it.
Every 30 minutes, stir the mixture with a fork to break up any ice crystals until it reaches the desired consistency.
Can I use vanilla extract instead of vanilla beans?
While you can use vanilla extract, the flavor will not be as rich or authentic as using real vanilla beans.
If you choose to use extract, add about 1-2 teaspoons to the custard once it has cooled.
Can I add mix-ins like chocolate chips or fruit?
Absolutely! Add chocolate chips, crushed cookies, or fruit after churning the ice cream for extra flavor and texture.
How long does the ice cream need to chill before I churn it?
You should chill the custard for at least 4 hours, but ideally overnight, for the best texture.
How do I know when the custard is done cooking?
When the custard coats the back of a spoon and leaves a clear line when you run your finger through it, it’s ready!
You can also use a thermometer; it should reach about 170°F (77°C).
Vanilla Bean Dream Ice Cream
Equipment
- 1 Medium Saucepan
- 1 Whisk
- 1 wooden spoon or silicone spatula
- 1 Sharp Knife
- 1 Ice Cream Maker
- 1 medium bowl
- 1 Airtight Container for Storage
Ingredients
- 2 cups 480 ml Heavy cream
- 1 cup 240 ml Whole milk
- ¾ cup 150 g Granulated sugar
- 5 Large egg yolks
- 2 Vanilla beans
- Pinch of salt
Instructions
Prepare the Vanilla Beans
- Split the vanilla beans in half lengthwise using a sharp knife. Scrape out the seeds with the back of the knife and set aside. You can also use the vanilla pods for extra flavor if desired.
Make the Custard Base
- Combine the heavy cream, whole milk, and sugar in a medium saucepan over medium heat. Stir until the sugar dissolves completely, and the mixture begins to steam (do not let it boil).
Temper the Egg Yolks
- In a separate bowl, whisk the egg yolks until light in color. Slowly pour a small amount of the hot cream mixture into the egg yolks to temper them, whisking constantly. Gradually add the rest of the cream mixture into the yolks, whisking the entire time.
Cook the Custard
- Pour the egg and cream mixture back into the saucepan. Cook over low heat, stirring constantly, until the mixture thickens and coats the back of a spoon, about 8–10 minutes. Remove from heat.
Infuse with Vanilla
- Stir in the vanilla bean seeds and the vanilla pods (if using). Let it cool to room temperature, then transfer it to the refrigerator to chill for at least 4 hours or overnight.
Churn the Ice Cream
- Once the custard is fully chilled, pour it into an ice cream maker and churn according to the manufacturer’s instructions, about 20–30 minutes.
Freeze to Firm
- Once churned, transfer the ice cream to an airtight container and smooth the top. Cover with plastic wrap and seal with the lid. Freeze for at least 4 hours to allow the ice cream to firm up.
Serve and Enjoy
- Scoop the Vanilla Bean Dream Ice Cream into bowls or cones and enjoy the creamy, vanilla goodness!
Notes
- Vanilla Beans: For the best flavor, use fresh, high-quality vanilla beans. If you’re unable to find them, you can substitute with 1-2 teaspoons of vanilla extract, although the flavor may be less intense.
- Chilling Time: Ensure the custard is well-chilled before churning, as this is essential for creating a smooth texture.
- Serving Tip: If the ice cream is too hard after freezing, let it sit at room temperature for 5–10 minutes before scooping.