All products are selected by our editorial team for quality. If you buy through our links, we may earn a small commission at no extra cost to you.
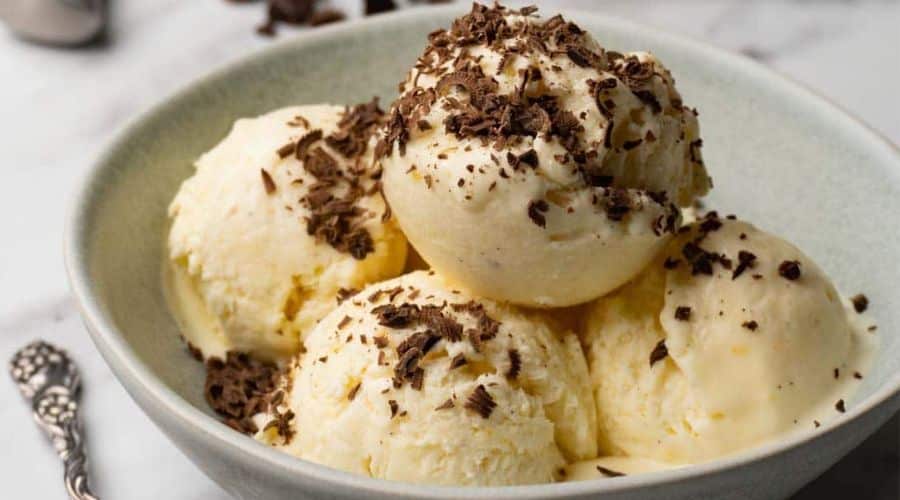
Vanilla bean ice cream is the epitome of timeless dessert perfection.
Its velvety texture and rich, creamy flavor make it a universal favorite, whether savored alone or as the perfect companion to pies, cakes, and warm pastries.
The true magic of this classic treat lies in the real vanilla bean, with its unmistakable aroma and speckled seeds that infuse every bite with a burst of authentic flavor.
Unlike its store-bought counterparts, homemade vanilla bean ice cream lets you control the ingredients, ensuring a dessert that’s as wholesome as it is indulgent.
Get ready to elevate your dessert game with this easy-to-follow recipe, delivering a scoopable delight that’s as visually appealing as it is delicious.

Health Benefits of Vanilla Bean Ice Cream
1. Good Source of Healthy Fats
The heavy cream and whole milk in this recipe provide healthy fats, which help in nutrient absorption and support brain function.
2. Rich in Protein
Egg yolks contribute protein, essential for muscle repair, immune function, and overall body maintenance.
3. Natural Antioxidants
Vanilla beans contain antioxidants that help combat oxidative stress and support cell health.
4. Mood-Boosting Effects
The aroma of vanilla has been linked to relaxation and mood enhancement, reducing stress and anxiety.
5. Energy Boost
The sugar and carbohydrates provide a quick energy boost, making this dessert a good option for an occasional treat.
Ingredients for Vanilla Bean Ice Cream
Key Ingredients
Vanilla Bean: The heart of this recipe. It provides a deep, aromatic flavor that’s impossible to replicate with artificial alternatives. Look for plump, fragrant beans for the best results.
Heavy Cream: Creates a luscious and creamy texture, giving the ice cream its signature richness.
Whole Milk: Balances the cream for a perfect consistency.
Granulated Sugar: Sweetens the ice cream without overpowering the vanilla’s natural essence.
Egg Yolks: Act as a natural thickener, creating a custard base that’s smooth and silky.
Salt: Just a pinch to enhance all the flavors.
Optional Additions
Vanilla Extract: A tiny splash to complement the vanilla bean and deepen the flavor.
Toppings: Consider fresh berries, a drizzle of chocolate, or a sprinkling of crushed nuts for serving.
This carefully chosen combination of ingredients ensures a vanilla bean ice cream that’s both indulgent and irresistibly flavorful.
Step-by-Step Recipe: How to Make Vanilla Bean Ice Cream

Step 1: Prepare the Vanilla Bean
Begin by splitting the vanilla bean lengthwise with a sharp knife. Carefully scrape out the tiny seeds using the back of the knife.
Set both the seeds and the pod aside for use in the next step.
Step 2: Create the Custard Base
In a medium saucepan, combine heavy cream, whole milk, granulated sugar, vanilla bean seeds, and the pod.
Place the mixture over medium heat and stir occasionally until it’s warm but not boiling.
In a separate bowl, whisk the egg yolks until smooth.
Gradually temper the yolks by slowly adding a small amount of the warm cream mixture while whisking constantly.
Once tempered, pour the yolks back into the saucepan with the remaining cream mixture.
Step 3: Cook the Custard
Cook the custard over medium-low heat, stirring constantly with a wooden spoon or spatula, until it thickens enough to coat the back of the spoon.
Avoid boiling, as this can curdle the mixture.
Step 4: Chill the Custard
Remove the custard from the heat and strain it through a fine-mesh sieve into a clean bowl to remove the vanilla pod and any cooked egg bits.
Cover the bowl with plastic wrap, pressing it directly onto the surface of the custard to prevent a skin from forming.
Chill in the refrigerator for at least 4 hours, or overnight for best results.
Step 5: Churn the Ice Cream
Pour the chilled custard into your ice cream maker and churn it according to the manufacturer’s instructions.
This usually takes 20–25 minutes, resulting in a soft-serve consistency.
Step 6: Freeze and Serve
Transfer the churned ice cream into an airtight container. Freeze for 2–4 hours, or until firm.
When ready to serve, scoop into bowls or cones and enjoy the luxurious, creamy treat.
Recipe Variations
- French Vanilla Ice Cream – Add an extra egg yolk for a richer, custard-like texture.
- Honey Vanilla Ice Cream – Replace granulated sugar with ½ cup of honey for a natural sweetness and floral flavor.
- Vanilla Bean & Almond Ice Cream – Add ½ teaspoon of almond extract for a nutty twist.
- Chocolate Swirl Vanilla Ice Cream – Drizzle in melted chocolate during the last few minutes of churning for a marbled effect.
- Vanilla Bean & Berry Ice Cream – Fold in chopped strawberries, blueberries, or raspberries after churning for a fruity contrast.
- Dairy-Free Vanilla Ice Cream – Swap heavy cream and whole milk with full-fat coconut milk and use a dairy-free alternative for sweetening.
- Keto Vanilla Ice Cream – Replace sugar with erythritol or monk fruit sweetener to make it low-carb.
- Spiced Vanilla Ice Cream – Add ½ teaspoon of cinnamon or nutmeg for a warm, cozy flavor.
- Vanilla Bean & Coffee Ice Cream – Mix in 1 tablespoon of instant espresso powder for a subtle coffee kick.
- Boozy Vanilla Ice Cream – Stir in 1 tablespoon of bourbon, rum, or Bailey’s for an adult-friendly treat.
Serving Suggestions
Classic Scoop – Serve a generous scoop of vanilla bean ice cream in a classic bowl or cone for a simple yet indulgent treat.
Sundae – Top the ice cream with hot fudge, caramel sauce, or fruit compote and finish with whipped cream and a cherry.
Pie A La Mode – Pair with a warm slice of apple pie, chocolate pie, or peach cobbler for a comforting dessert combo.
Ice Cream Sandwich – Scoop the vanilla ice cream between two chocolate chip cookies or your favorite cookie variety.
Affogato – Pour a shot of espresso over a scoop of vanilla ice cream for a deliciously rich dessert.
Fruit Parfait – Layer the ice cream with fresh berries, granola, or crushed cookies for a crunchy, fruity twist.
Milkshake – Blend the ice cream with a little milk to create a creamy milkshake. Add your favorite syrup or mix-ins like chocolate chips for extra flavor.
In a Waffle Cone – Serve in a crispy waffle cone for the ultimate ice cream experience.
With Warm Desserts – Pair with warm brownies, cookies, or churros for a delightful contrast of temperatures.
Topped with Nuts – Add a sprinkle of chopped almonds, pecans, or pistachios for added crunch and flavor.
Expert Tips for the Perfect Vanilla Bean Ice Cream
Tip 1: Choose High-Quality Vanilla Beans
The quality of your vanilla bean greatly impacts the flavor. Opt for Madagascar or Tahitian vanilla beans, known for their rich and fragrant profiles.
Tip 2: Don’t Skip the Chilling Step
Allowing the custard to chill thoroughly ensures a smoother texture and better churning in the ice cream maker. Overnight chilling is ideal for optimal results.
Tip 3: Avoid Overheating the Custard
Keep the heat low when cooking the custard. Stir constantly to prevent curdling and to achieve the perfect creamy base.
Tip 4: Customize Your Texture
For a firmer ice cream, freeze it longer after churning. If you prefer a softer texture, reduce the freezing time or enjoy it straight from the churn.
Tip 5: Experiment with Add-Ins
Enhance the base by folding in mix-ins like crushed cookies, chocolate chunks, or caramel swirls after churning for a personalized twist on this classic treat.
By following these steps and expert tips, you’ll create a batch of vanilla bean ice cream that’s indulgent, aromatic, and guaranteed to impress!
Frequently Asked Questions (FAQs)
1. Can I make vanilla bean ice cream without an ice cream maker?
Yes, you can! After chilling the custard, pour it into a shallow dish and freeze.
Stir every 30 minutes for 2–3 hours to break up ice crystals and achieve a creamy consistency.
2. What is the difference between vanilla extract and vanilla beans?
Vanilla beans provide a richer, more natural flavor with tiny, aromatic seeds, while vanilla extract is a liquid derived from vanilla beans.
Beans are ideal for recipes where the vanilla flavor shines.
3. How long can homemade vanilla bean ice cream be stored?
Store it in an airtight container in the freezer for up to 2 weeks. Beyond that, ice crystals may form, affecting texture and flavor.
4. Can I substitute vanilla extract for vanilla beans?
While vanilla beans are preferred, you can use 1–2 teaspoons of high-quality pure vanilla extract as a substitute.
However, you’ll miss out on the unique speckled appearance and the deep, complex flavor of vanilla beans.
5. Why does my ice cream have an icy texture?
An icy texture often results from insufficient fat content, lack of thorough chilling, or over-freezing.
Ensure you use heavy cream and allow the custard to chill completely before churning.
Conclusion
Vanilla bean ice cream is the ultimate indulgence that brings the luxurious flavor of real vanilla to your table.
With its creamy texture, rich aroma, and elegant simplicity, it’s a dessert that never goes out of style.
Whether enjoyed solo, paired with your favorite desserts, or customized with creative add-ins, this homemade treat is sure to become a family favorite.
Try this recipe today and transform a handful of simple ingredients into a gourmet delight.
Don’t forget to share your experience and any fun twists you’ve added in the comments below.
Vanilla Bean Ice Cream
Equipment
- 1 Knife
- 1 Cutting board
- 1 Small bowl
- 1 Medium Saucepan
- 1 Whisk
- 1 wooden spoon or spatula
- 1 Fine Mesh Sieve
- 1 Mixing Bowl
- 1 Plastic wrap
- 1 Ice Cream Maker
- 1 Airtight container
Ingredients
- 1 Vanilla bean
- 2 cups Heavy cream
- 1 cup Whole milk
- 2/3 cup Granulated sugar
- 4 large Egg yolks
- 1 pinch Salt
Optional: 1 teaspoon Vanilla extract
Instructions
- Prepare the Vanilla Bean: Split the vanilla bean lengthwise using a knife and scrape out the seeds. Set the seeds and pod aside.
- Make the Custard Base: In a medium saucepan, combine the heavy cream, whole milk, granulated sugar, vanilla bean seeds, and the pod. Heat over medium heat, stirring occasionally, until the mixture is warm but not boiling.
- Temper the Egg Yolks: In a small bowl, whisk the egg yolks. Slowly add a ladleful of the warm cream mixture to the yolks while whisking constantly. Gradually pour the tempered yolks back into the saucepan, stirring to combine.
- Cook the Custard: Reduce the heat to medium-low and cook the custard, stirring constantly with a wooden spoon or spatula, until it thickens enough to coat the back of the spoon. Do not let it boil.
- Strain and Chill: Remove from heat and strain the custard through a fine-mesh sieve into a clean mixing bowl. Discard the vanilla pod and any solid bits. Cover the custard with plastic wrap, pressing it directly onto the surface, and refrigerate for at least 4 hours or overnight.
- Churn the Ice Cream: Once chilled, pour the custard into your ice cream maker and churn according to the manufacturer’s instructions, typically 20–25 minutes.
- Freeze and Serve: Transfer the churned ice cream into an airtight container. Freeze for 2–4 hours, or until firm. Serve and enjoy!
Notes
Recipe Notes
- For the best flavor, use high-quality vanilla beans like Madagascar or Tahitian.
- Ensure the custard is completely chilled before churning to achieve a smooth texture.
- Store in the freezer for up to 2 weeks in an airtight container.
- Add mix-ins like chocolate chips, crushed cookies, or caramel swirls after churning for a fun twist.