All products are selected by our editorial team for quality. If you buy through our links, we may earn a small commission at no extra cost to you.
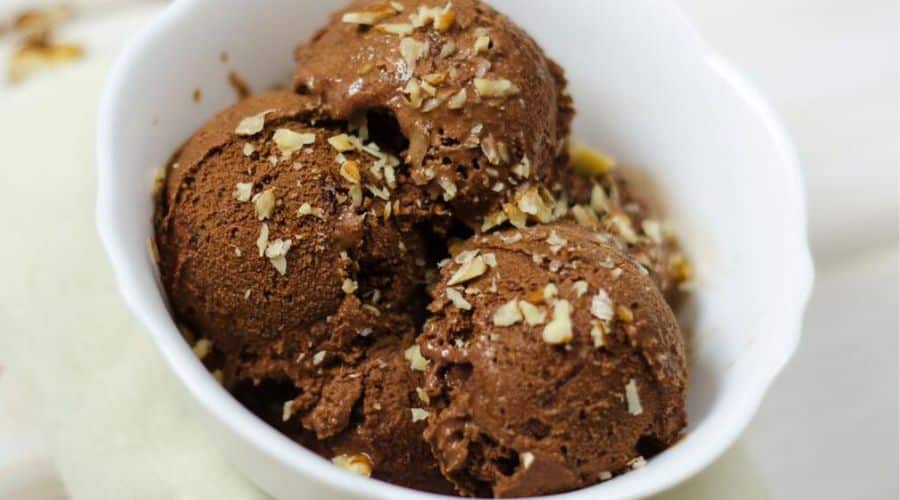
If you’re a fan of rich, indulgent ice cream and love the convenience of homemade treats, then this Ninja Creami Chocolate Hazelnut Ice Cream recipe is a must-try.
Using the Ninja Creami machine, this recipe combines the smooth, creamy texture of ice cream with the rich, nutty flavors of chocolate and hazelnut.
It’s the perfect way to enjoy a decadent dessert without having to leave the house.
Whether you’re serving it up for a special occasion or just treating yourself, this homemade ice cream will be a hit with everyone who loves a classic flavor combo with a twist.
Why You’ll Love Ninja Creami Chocolate Hazelnut Ice Cream
There are countless reasons why you’ll fall in love with this Ninja Creami Chocolate Hazelnut Ice Cream. First and foremost, the texture.
The Ninja Creami machine ensures that your ice cream comes out creamy, smooth, and velvety every time – no more icy, hard chunks that you often get with traditional ice cream.
The chocolate hazelnut flavor is a delightful balance of rich chocolatey goodness and the toasty, nutty flavors of hazelnuts, making each bite a heavenly experience.
Whether you’re a chocolate lover or a fan of hazelnuts, this ice cream hits the spot.
Plus, making your ice cream at home means you have full control over the ingredients, ensuring a fresher and healthier treat with no preservatives or artificial flavors.
Ingredients Needed for Ninja Creami Chocolate Hazelnut Ice Cream
To make this delicious Ninja Creami Chocolate Hazelnut Ice Cream, you’ll need the following ingredients:
- 2 cups heavy cream – for that rich, creamy base.
- 1 cup whole milk – helps balance the creaminess and adds smoothness.
- 1/2 cup chocolate hazelnut spread (like Nutella) – for that irresistible chocolate hazelnut flavor.
- 3/4 cup granulated sugar – to sweeten the mixture.
- 1 tsp vanilla extract – to enhance the flavor.
- 1/2 cup roasted hazelnuts (optional) – to add texture and extra nutty flavor.
These simple yet flavorful ingredients come together to create an ice cream that’s rich, smooth, and perfectly sweet with a satisfying crunch from the hazelnuts.
Step-by-Step Instructions to Make Ninja Creami Chocolate Hazelnut Ice Cream

Step 1: Prepare the Hazelnuts (Optional)
If you’re using roasted hazelnuts, start by toasting them lightly in the oven to bring out their natural flavor.
Simply place the hazelnuts on a baking sheet and toast them in the oven at 350°F for 5-10 minutes, stirring halfway through.
Once roasted, let them cool, then chop them into smaller pieces or crush them slightly if you prefer a smoother texture in your ice cream.
Step 2: Make the Chocolate Hazelnut Ice Cream Base
In a medium saucepan, combine the heavy cream, whole milk, and sugar.
Heat the mixture over medium heat, stirring occasionally, until the sugar dissolves and the mixture is heated through.
Be careful not to boil it. Once the sugar is dissolved, remove the pan from the heat and whisk in the chocolate hazelnut spread and vanilla extract.
Stir until the spread is completely melted and the mixture is smooth and well-combined.
Step 3: Freeze the Ice Cream Base
Once your ice cream base is ready, transfer it to a freezer-safe container, making sure it’s well spread out.
Allow it to cool to room temperature before placing it in the freezer.
Freeze the base for at least 4 hours, or preferably overnight, until it’s completely frozen and solid.
Step 4: Process with the Ninja Creami
Once your ice cream base is frozen, take it out of the freezer and place it in the Ninja Creami’s pint container.
Follow the manufacturer’s instructions and process the mixture in the Ninja Creami until it reaches a creamy, soft-serve consistency.
If desired, you can mix in the chopped roasted hazelnuts at this stage for added crunch.
Step 5: Final Touches
After processing, you can scoop out your homemade chocolate hazelnut ice cream and serve it right away for a soft, creamy texture.
If you prefer a firmer consistency, return the ice cream to the freezer for a couple of hours before serving.
Enjoy it on its own or with additional toppings like more roasted hazelnuts, chocolate shavings, or a drizzle of chocolate syrup.
Recipe Variation
- Dairy-Free Option: Substitute the heavy cream with full-fat coconut milk and the whole milk with almond or oat milk. Use a dairy-free chocolate hazelnut spread.
- Keto-Friendly: Replace granulated sugar with a keto-friendly sweetener like erythritol or monk fruit sweetener.
- Extra Chocolatey: Mix in chocolate chips or chunks before freezing for a richer chocolate experience.
- Nut-Free Alternative: Swap hazelnut butter with sunflower seed butter or cookie butter for a different flavor.
- Protein Boost: Add a scoop of chocolate or vanilla protein powder to the base for a protein-rich dessert.
Tips for Perfect Ninja Creami Chocolate Hazelnut Ice Cream
To ensure that your Ninja Creami Chocolate Hazelnut Ice Cream turns out perfectly every time, here are a few tips to keep in mind:
Use Full-Fat Dairy – For the creamiest ice cream, use full-fat heavy cream and whole milk.
Low-fat versions can result in a less creamy texture.
Chill the Base Well – Make sure your ice cream base is completely chilled before freezing it.
This helps it freeze evenly and ensures a smooth texture when processed in the Ninja Creami.
Freeze the Base for Long Enough – Allow the base to freeze for at least 4 hours, but overnight is best.
This ensures the mixture is solid enough for the Ninja Creami to process it effectively.
Optional Add-ins – If you like a bit of texture, mix in chopped hazelnuts or chocolate chunks after the base is processed in the Ninja Creami.
Add-ins should be added during the last stage of processing.
Consistency Control – If your ice cream turns out too soft, reprocess it in the Ninja Creami for a firmer texture.
If it’s too hard, add a splash of milk and reprocess.
Storage & Reheating Tips for Ninja Creami Chocolate Hazelnut Ice Cream
Storage:
Once your ice cream is ready, transfer it to an airtight container and store it in the freezer.
Homemade ice cream will keep for up to 1-2 weeks, though it’s best to enjoy it sooner for the freshest taste and texture.
Reheating:
If your ice cream becomes too hard after being stored in the freezer, you can soften it by letting it sit at room temperature for a few minutes before scooping.
If it’s still too firm, you can also process it again in the Ninja Creami by adding a splash of milk for a creamier consistency.
Conclusion – Enjoy the Creamiest Ninja Creami Chocolate Hazelnut Ice Cream
Now that you know how to make the creamiest, most indulgent Ninja Creami Chocolate Hazelnut Ice Cream, it’s time to treat yourself to a bowl of this rich, decadent dessert.
Whether you’re serving it up for a special occasion or enjoying it on a quiet evening, this homemade ice cream will never disappoint.
Its smooth texture and delightful chocolate hazelnut flavor make it the perfect dessert for any time of the year.
Frequently Asked Questions
1. Can I use almond milk or coconut milk in this recipe?
Yes, you can substitute almond milk or coconut milk for the whole milk, but the texture might be slightly less creamy.
To compensate, consider using full-fat coconut milk for a richer flavor.
2. Do I need to roast the hazelnuts?
Roasting the hazelnuts is optional, but it brings out their natural nutty flavor and adds a nice crunch to the ice cream.
If you prefer a smoother texture, you can skip the roasting step.
3. Can I make the ice cream without a Ninja Creami?
Yes, you can make the ice cream without the Ninja Creami, but it will require more manual effort.
After freezing the base, you would need to blend or stir the ice cream every 30 minutes to break up any ice crystals until it reaches the desired creamy consistency.
4. How long does it take to process the ice cream in the Ninja Creami?
Typically, it takes about 2-3 minutes to process the ice cream in the Ninja Creami, depending on the consistency you want.
You can repeat the process for a firmer texture if needed.
5. Can I add other flavors or mix-ins to this recipe?
Absolutely! You can customize your ice cream by adding other mix-ins such as chocolate chips, a swirl of caramel, or even a dash of espresso powder for a mocha flavor.
Just be sure to add them after the initial processing for best results.

Ninja Creami Chocolate Hazelnut Ice Cream
Equipment
- 1 Ninja Creami Ice Cream Maker
- 1 Mixing Bowl
- 1 Whisk
- 1 Airtight Container for Storage
- 1 Measuring Cups and Spoons
Ingredients
- 2 cups Heavy cream
- 1 cup Whole milk
- 1/2 cup Granulated sugar
- 1/2 cup Hazelnut butter or Nutella
- 1/4 cup Cocoa powder
- 1 tsp Vanilla extract
- 1/2 cup Chopped roasted hazelnuts optional for texture
Instructions
- Prepare the Base: In a mixing bowl, whisk together the heavy cream, whole milk, granulated sugar, cocoa powder, and vanilla extract until well combined. Add the hazelnut butter (or Nutella) and whisk until smooth and creamy.
- Freeze the Mixture: Pour the ice cream base into the Ninja Creami pint container. Ensure it is not filled past the "max fill" line. Cover the container with the lid and place it in the freezer. Freeze the base for at least 4 hours, preferably overnight.
- Process in the Ninja Creami: Once the base is completely frozen, remove the pint container from the freezer. Attach the pint to the Ninja Creami and process on the "Ice Cream" setting.If the mixture is too hard, reprocess it or add a splash of milk to adjust the texture.
- Add Mix-ins: If you’d like to add roasted chopped hazelnuts for extra crunch, fold them into the ice cream after processing, mixing gently with a spatula.
- Serve & Enjoy: Scoop the creamy chocolate hazelnut ice cream into bowls or cones and enjoy! Store any leftovers in an airtight container in the freezer.
Notes
- Chilling Tip: Ensure the ice cream base is thoroughly chilled before processing it in the Ninja Creami. If it’s not cold enough, the texture may not be as creamy.
- Customization: Add a swirl of caramel, a sprinkle of sea salt, or even chocolate chunks for added texture and flavor.
- No Ninja Creami? You can still make this ice cream manually by freezing the base and stirring it every 30 minutes to break up ice crystals until the desired consistency is achieved.
- Storage: Store any leftover ice cream in an airtight container for up to 1-2 weeks.