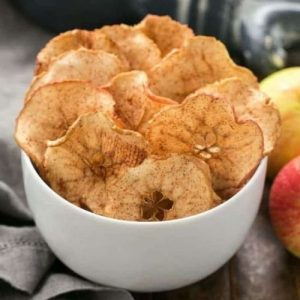
These Cinnamon Apple Chips are a simple, wholesome snack that transforms everyday apples into a naturally sweet, fiber-packed treat.
Low in fat and bursting with cinnamon flavor, they’re perfect for guilt-free munching or a quick snack.
Easy to prepare and naturally plant-based, they make an ideal option for meal prep, lunchboxes, or cozy afternoons at home.
Cinnamon Apple Chips
Equipment
- 2–3 Baking sheets
- Parchment paper (2–3 sheets)
- Mandoline slicer or sharp knife
- Large mixing bowl
Ingredients
- 4 medium apples any crisp variety, e.g., Honeycrisp, Pink Lady
- 1 tablespoon granulated sugar
- 1 teaspoon ground cinnamon
Instructions
- Preheat Oven Properly: Begin by setting your oven to 200°F (about 95°C). This low temperature ensures the apple slices dry slowly and evenly without burning, creating a soft, naturally sweet texture. While the oven warms, prepare your baking sheets to make the process seamless.
- Prepare Baking Sheets: Line 2–3 baking sheets with parchment paper. This prevents the apple slices from sticking and helps with even airflow during baking. Make sure the sheets are completely covered, leaving a little extra paper over the edges for easy handling later.
- Wash and Dry Apples: Rinse your apples thoroughly under cold water to remove any residue or wax coating. Pat them completely dry with a clean kitchen towel or paper towels. Moisture on the surface can slow down the drying process and make the slices soggy.
- Slice Apples Thinly: Using a mandoline slicer or a sharp knife, slice the apples into very thin rounds, approximately 1/16 inch thick. Cutting through the core is fine; just discard the small ends that contain seeds. Thin slices are essential for even baking and a delicate, crisp texture.
- Mix Cinnamon and Sugar: In a large mixing bowl, combine 1 tablespoon of sugar with 1 teaspoon of ground cinnamon. Stir well so the mixture is uniform. This ensures that every apple slice gets a consistent layer of sweet, spiced flavor.
- Coat Apple Slices: Add the apple slices to the bowl and gently toss them with the cinnamon-sugar mixture. Using your fingers, lightly rub the mixture onto each slice. For best results, rub slices together to ensure the sugar and cinnamon cling evenly, creating a balanced, flavorful coating.
- Arrange Slices on Baking Sheets: Lay the coated apple slices in a single layer on the prepared baking sheets. Make sure slices do not overlap; each piece needs space for air to circulate, which helps them dry evenly. Remove any seeds that remain during this step.
- First Bake Cycle: Place the baking sheets in the preheated oven and bake for 1 hour and 30 minutes. During this time, the apples slowly release moisture, concentrating their natural sweetness. Avoid opening the oven frequently, as it can affect temperature consistency.
- Flip Apple Slices: After 1 hour and 30 minutes, carefully remove the sheets from the oven. Using your fingers or a thin spatula, gently flip each apple slice over to expose the other side. This ensures even drying and prevents soggy spots.
- Second Bake Cycle: Return the baking sheets to the oven and continue baking for another hour. By this point, the apple slices should be soft but slightly firm to the touch. This slow, two-step process prevents burning and maintains their natural flavors.
- Oven Cooling Phase: Once the second bake is complete, turn off the oven but leave the baking sheets inside. Allow the apple slices to cool slowly in the oven for several hours or overnight. This final phase helps the chips set without crisping too aggressively, giving them a delicate texture that balances between dried fruit and chip.
- Storage Instructions: Transfer fully cooled apple chips into an airtight container. Store at room temperature for up to a week. If the chips absorb moisture and become soft over time, re-crisp them by placing them on a baking sheet in a 200°F oven for a few hours or overnight.
- Optional Serving Tip: For extra presentation appeal, sprinkle a little extra cinnamon on top before serving, or pair the apple chips with nut butter for added protein and creaminess. They make a perfect afternoon snack, lunchbox treat, or cozy nibble with tea or coffee.
Notes
- Use firm, crisp apples like Honeycrisp, Pink Lady, or Fuji for the best texture and natural sweetness.
- Slice apples very thin (around 1/16 inch) to ensure even baking and a delicate finish.
- Cinnamon and sugar amounts can be adjusted to taste; consider using coconut sugar or a sugar substitute for a lower-calorie option.
- Baking at low temperatures over a long period prevents burning and enhances natural apple sweetness.
- The chips won’t be crunchy like potato chips initially; slow cooling in the oven helps set their texture.
- Re-crisp soft chips by returning them to a low oven for a few hours or overnight.
Chef’s Secrets To Perfect Chips
The secret to creating beautifully balanced cinnamon apple chips lies in patience and precision.
First, selecting the right apples is crucial—firm, crisp varieties yield the best texture.
Thin, uniform slices allow moisture to evaporate evenly without browning too fast.
Lightly coating each slice with cinnamon and sugar ensures even flavor distribution.
Finally, the slow “cooling in the oven” step helps achieve that ideal texture that sits between dried fruit and a chip, keeping them soft yet slightly chewy.
Avoid shortcuts like higher temperatures; rushing the process can result in unevenly baked or burnt chips.
Serving Suggestions For Maximum Enjoyment
Cinnamon Apple Chips are a versatile snack that pairs beautifully with a variety of foods.
Enjoy them on their own for a naturally sweet, low-fat treat, or serve alongside nut butter, yogurt, or oatmeal for added protein and creaminess.
They also make a delightful topping for breakfast bowls or a crunchy addition to salads.
Pack them in lunchboxes or snack bags for easy, on-the-go munching.
For a cozy treat, pair with warm tea, coffee, or a lightly spiced latte to enhance the cinnamon flavor.
Storage Tips For Longevity
To maintain freshness, store fully cooled apple chips in an airtight container at room temperature for up to a week.
If you notice any softening due to moisture, simply return them to a 200°F oven for a few hours to re-crisp.
Avoid storing in a humid environment, which can make them sticky.
For longer-term storage, consider freezing in a sealed container; just reheat in a low oven to restore texture before enjoying.
Label your container with the date to keep track of their peak freshness.
Frequently Asked Questions
1. Can I use different types of apples?
Yes! Crisp, firm apples like Honeycrisp, Fuji, or Pink Lady work best. Softer apples may become too mushy during baking.
Mixing varieties can create a combination of sweet and tart flavors.
2. Do the chips get crispy like potato chips?
These chips are more like dried fruit than traditional chips.
They have a slightly chewy texture, but you can re-crisp them by baking at 200°F for a few hours after storage.
3. Can I make them without sugar?
Absolutely! You can omit sugar entirely or use a sugar substitute.
The natural sweetness of apples is enough for a flavorful snack, and cinnamon alone adds warmth and depth.
4. How do I prevent burning or uneven baking?
Slice apples uniformly and bake at a low temperature (200°F).
Flip slices halfway through the baking process and avoid overcrowding the sheets. Slow, steady baking ensures even drying.
5. Can I prepare these in advance?
Yes, cinnamon apple chips are ideal for meal prep. Bake them ahead of time, store in an airtight container, and re-crisp as needed.
They make a convenient, ready-to-eat snack for busy days.