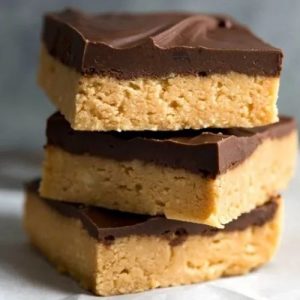
These no-bake Chocolate Peanut Butter Bars are a quick and irresistible treat that combines creamy peanut butter with rich dark chocolate.
Packed with plant-based protein and healthy fats, they’re a satisfying snack or dessert option.
Naturally fiber-rich from the biscuit base and low in added saturated fats, these bars are perfect for busy days, easy meal prep, or a guilt-free indulgence that everyone will love.
Chocolate Peanut Butter Bars
Equipment
- 8-inch (20 cm) square pan
- Baking paper
- Mixing bowl
- Spoon or spatula
- Microwave-safe bowl
Ingredients
Base:
- 115 g 1/2 cup / 1 US stick butter, melted
- 1 cup crushed plain biscuits e.g., Marie, graham crackers
- 1 cup powdered sugar
- 3/4 cup smooth peanut butter
Topping:
- 1 cup dark chocolate chips melting variety
- 2 tbsp smooth peanut butter
Instructions
- Prepare the Pan: Start by lining an 8-inch (20 cm) square baking pan with baking paper. Make sure the paper covers the sides as well as the bottom. This ensures the bars can be lifted out easily after chilling without sticking. If desired, lightly grease the paper with a small amount of butter to prevent any sticking.
- Crush the Biscuits: Take 1 cup of plain biscuits such as Marie, graham crackers, or Digestives. Place them in a food processor and pulse until they form fine crumbs. If you don’t have a processor, place the biscuits in a large ziplock bag and crush them using a rolling pin or the bottom of a heavy pan. Aim for a uniform, sand-like texture to ensure the base binds well.
- Mix the Base Ingredients: In a medium mixing bowl, combine the melted butter, crushed biscuits, powdered sugar, and 3/4 cup smooth peanut butter. Use a spatula or wooden spoon to mix thoroughly. Press the mixture together until fully combined, making sure there are no dry streaks of biscuit or powdered sugar. The texture should be slightly sticky but moldable.
- Press the Base into the Pan: Transfer the base mixture into the prepared baking pan. Using the back of a spoon, a spatula, or your hands, press the mixture evenly into the pan. Aim for a smooth, level surface, pressing firmly to create a compact base. A well-packed base ensures the bars hold their shape when cut.
- Melt the Chocolate Topping: In a microwave-safe bowl, combine 1 cup of dark chocolate chips and 2 tablespoons of smooth peanut butter. Microwave in short 30-second bursts, stirring in between, until fully melted and smooth. The mixture should be glossy and pourable, without any lumps. Be careful not to overheat, as chocolate can burn quickly.
- Spread the Chocolate Layer: Pour the melted chocolate-peanut butter mixture evenly over the pressed base. Use a spatula or the back of a spoon to gently spread it to the edges. You can leave it smooth for a classic look or create gentle swirls with a toothpick or knife for a decorative touch. Take your time to make the top visually appealing.
- Chill Until Set: Place the pan in the refrigerator for at least 1 1/2 hours, or until the chocolate layer is completely firm. Chilling is essential, as it allows the bars to set properly and makes cutting clean squares easier. Avoid rushing this step; the texture improves significantly if the bars are fully chilled.
- Slice and Serve: Remove the pan from the fridge and allow it to sit at room temperature for a few minutes to soften slightly for easier cutting. Lift the bars out of the pan using the baking paper, then transfer to a cutting board. Using a sharp knife, cut into 16 equal squares or any preferred shape. Clean the knife between cuts for neat edges.
- Enjoy and Store: Serve at room temperature for the best texture and flavor. These bars are perfect as a snack, dessert, or even a small indulgent breakfast treat. Store any leftovers in an airtight container at room temperature for up to 5 days. In warmer climates, refrigeration is recommended, but always bring to room temperature before serving to keep the chocolate soft and creamy.
Notes
- Use dry, crisp biscuits (e.g., Marie, graham crackers, Digestives) for a sturdy base; avoid soft or filled biscuits.
- Crush biscuits finely for a uniform texture; use a food processor or a rolling pin.
- Press the base firmly into the pan to ensure bars hold together neatly.
- Melt the chocolate topping slowly in short bursts, stirring often to avoid burning.
- Allow bars to chill completely before slicing for clean, even squares.
- Optional: lightly grease the baking paper to make lifting the bars easier.
- Bars can be served slightly chilled or at room temperature for the best creamy texture.
Chef’s Secrets: Tricks For Perfect Bars
To elevate these bars, consider a few chef-inspired tips.
Slightly toasting the biscuit crumbs in a dry pan can enhance the nutty flavor and add depth to the base.
For a shinier chocolate layer, stir a teaspoon of coconut oil into the melted chocolate-peanut butter mixture.
If you want cleaner cuts, warm your knife under hot water, wipe it dry, and then slice.
These small adjustments make the bars not only taste better but also look professional.
Serving Suggestions: Delicious Ways To Enjoy
These bars are versatile and can be served in many ways.
Pair them with a cup of coffee, tea, or milk for a satisfying afternoon snack.
For a more indulgent dessert, top each square with a sprinkle of sea salt, a few chopped peanuts, or a drizzle of caramel sauce.
They also work beautifully in lunchboxes or as a make-ahead treat for parties.
Serve slightly chilled or at room temperature to enjoy the creamy, melt-in-your-mouth texture.
Storage Tips: Keep Bars Fresh Longer
To maintain the perfect texture, store the bars in an airtight container.
At room temperature, they last up to 5 days; in warm climates, refrigeration is recommended.
If refrigerated, let them sit out for 10–15 minutes before serving to soften the chocolate layer.
Bars can also be frozen for up to a month—wrap each square individually in parchment paper and place in a freezer-safe container.
Thaw at room temperature for a few minutes before serving.
Frequently Asked Questions
1. Can I use crunchy peanut butter?
Yes, you can swap smooth peanut butter with crunchy for added texture.
Just be aware the base may be slightly less compact, but the nutty crunch is delicious.
2. Can I substitute biscuits for a gluten-free version?
Absolutely! Use gluten-free plain biscuits, gluten-free graham crackers, or crushed pretzels.
The flavor and texture remain surprisingly similar, making it a flexible option for gluten-free diets.
3. What type of chocolate works best?
Use chocolate chips intended for melting, either dark, milk, or semi-sweet. Baking or melting chocolate ensures a smooth topping that sets properly.
Avoid regular eating chocolate, as it may not melt evenly.
4. Can I make these bars ahead of time?
Yes, these bars are perfect for make-ahead preparation.
Store them in the fridge or freezer and slice just before serving. They maintain their texture and flavor beautifully.
5. Can I add extra flavors or toppings?
Definitely! Sprinkle chopped nuts, shredded coconut, or a drizzle of caramel or white chocolate over the top.
You can also swirl in a bit of peanut butter or Nutella for added flavor layers.
These customizations are simple and make the bars visually appealing.