
There’s nothing quite like the aroma of freshly baked bread filling your kitchen, and Honey Oat Dutch Oven Bread takes homemade bread to the next level.
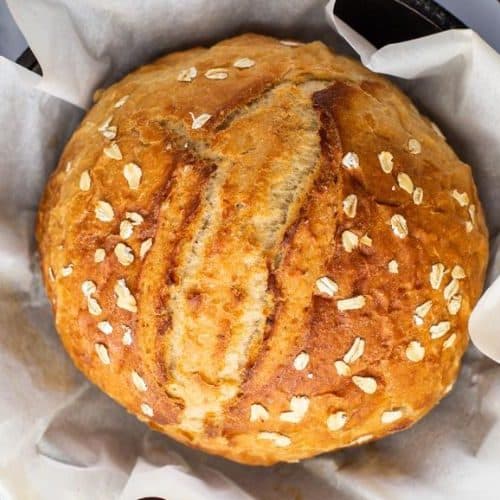
This rustic loaf boasts a beautiful golden crust, a soft and slightly chewy interior, and a subtle sweetness from honey that perfectly complements the nutty goodness of oats.
Baking bread in a Dutch oven creates a bakery-style crust that’s crisp on the outside while keeping the inside irresistibly moist.
Whether you’re a seasoned baker or trying homemade bread for the first time, this recipe is simple, rewarding, and incredibly delicious.
It pairs wonderfully with butter, honey, or your favorite spreads, making it perfect for breakfast, sandwiches, or a side to hearty soups and stews.

Why You’ll Love This Recipe
Easy and Foolproof
With minimal kneading and no complicated techniques, this bread is perfect for beginners.
The Dutch oven does most of the work, ensuring an evenly baked loaf with a crisp crust.
Wholesome and Nutritious
Made with simple, pantry-friendly ingredients like rolled oats, honey, and flour, this bread is packed with fiber and natural sweetness, making it a healthier alternative to store-bought bread.
Perfect for Any Meal
Enjoy it toasted with butter for breakfast, use it as a base for sandwiches, or serve it alongside soups and salads for a comforting meal.
No Special Equipment Needed
Aside from a Dutch oven, you don’t need any fancy tools—just a mixing bowl, measuring cups, and a little patience while the dough rises.
Ingredients Needed
For the Dough:
- Bread flour – Provides the structure and chewiness of the bread.
- Rolled oats – Adds a nutty texture and extra fiber.
- Honey – Natural sweetness that enhances flavor and helps with browning.
- Warm water – Activates the yeast and hydrates the flour.
- Instant yeast – Helps the dough rise quickly and develop a soft texture.
- Salt – Essential for flavor and proper gluten development.
- Olive oil – Adds moisture and improves the bread’s texture.
For the Topping (Optional):
- Extra rolled oats – Sprinkled on top for added texture and a beautiful finish.
- Drizzle of honey – Adds extra sweetness and a glossy golden crust.
Step-by-Step Instructions

Step 1: Activate the Yeast
If using active dry yeast, dissolve it in warm water with a teaspoon of honey. Let it sit for 5-10 minutes until foamy.
If using instant yeast, you can mix it directly with the dry ingredients.
Step 2: Mix the Dough
In a large mixing bowl, combine the bread flour, rolled oats, and salt. Pour in the activated yeast mixture (or instant yeast), honey, and olive oil. Stir until a shaggy dough forms.
Step 3: Knead and First Rise
Transfer the dough to a floured surface and knead for 8-10 minutes until it becomes smooth and elastic.
Place it in a greased bowl, cover with a damp towel, and let it rise in a warm spot for 1-2 hours, or until doubled in size.
Step 4: Shape the Dough and Second Rise
Once risen, gently deflate the dough and shape it into a round loaf. Place it on a piece of parchment paper, cover lightly, and let it rest for another 30-45 minutes while you preheat the Dutch oven.
Step 5: Preheat the Dutch Oven
Place the Dutch oven (with the lid on) into your oven and preheat to 450°F (230°C) for at least 30 minutes.
A hot Dutch oven creates steam, leading to a crisp crust.
Step 6: Bake the Bread
Carefully remove the Dutch oven from the oven. Lift the parchment paper with the dough and place it inside.
Cover and bake for 30 minutes. Remove the lid and bake for another 10-15 minutes until the crust turns deep golden brown.
Step 7: Cool and Serve
Transfer the bread to a wire rack and let it cool for 20-30 minutes before slicing. This allows the crumb to set and prevents it from becoming gummy.
Tips for Perfect Honey Oat Dutch Oven Bread
- Use a Kitchen Scale – Measuring by weight ensures accurate results.
- Preheat the Dutch Oven Properly – This step is key for achieving a crispy crust.
- Don’t Rush the Rise – Letting the dough rise fully improves the texture and flavor.
- Let the Bread Cool Before Slicing – Cutting too soon can result in a dense or gummy texture.
- Store Bread Correctly – Keep it fresh by storing it in an airtight container (see below for details).
How to Store & Reheat
At Room Temperature
Store the bread in a paper bag or an airtight container at room temperature for up to 3 days. Avoid refrigerating, as it can dry out the bread.
In the Freezer
Wrap the bread tightly in plastic wrap, followed by aluminum foil. Freeze for up to 3 months. Thaw at room temperature before reheating.
To Reheat
- In the Oven: Warm at 300°F (150°C) for 10 minutes to restore crispiness.
- In the Toaster: Slice and toast for a crispy texture.
What to Serve with Honey Oat Dutch Oven Bread
- For Breakfast: Spread with butter, jam, or peanut butter.
- For Lunch: Use it to make sandwiches with turkey, ham, or cheese.
- For Dinner: Pair with soups like tomato soup, butternut squash soup, or minestrone.
- For a Snack: Drizzle with honey and sprinkle with cinnamon for a lightly sweet treat.
Conclusion
Baking Honey Oat Dutch Oven Bread at home is a rewarding experience that fills your kitchen with warmth and comfort.
This easy, rustic loaf delivers a golden, crisp crust with a soft and slightly sweet interior, making it perfect for any meal of the day.
Whether you enjoy it for breakfast, as a sandwich, or paired with your favorite soup, this bread is sure to become a household favorite.
Give this recipe a try, and let us know how it turns out!
Share your baking experience in the comments, and don’t forget to check out more delicious bread recipes on the blog.
Frequently Asked Questions
Q1: Can I use quick oats instead of rolled oats?
Yes, but rolled oats provide a better texture and chewiness. Quick oats may dissolve more into the dough, altering the final texture.
Q2: Can I make this bread without a Dutch oven?
Yes! You can use a baking stone or an oven-safe pot with a lid. However, the crust may not be as crisp.
Q3: Why is my bread too dense?
This can happen if the yeast is old, the dough wasn’t kneaded enough, or it didn’t have enough time to rise.
Ensure your yeast is fresh and let the dough double in size before baking.
Q4: Can I make this bread whole wheat?
Yes! Substitute 50% of the bread flour with whole wheat flour.
Keep in mind that whole wheat absorbs more liquid, so you may need to add a bit more water.
Q5: How do I get a shinier crust?
Brushing the loaf with honey before baking can create a shinier, slightly sweeter crust.
You can also brush it with melted butter immediately after baking.
Honey Oat Dutch Oven Bread
Equipment
- 1 Large Mixing Bowl – For mixing the dough
- 1 Measuring Cup (for liquids)
- 1 Measuring Spoon Set – For yeast, salt, and honey
- 1 Wooden Spoon or Dough Scraper – For mixing the dough
- 1 Dutch Oven (6-Quart or Larger) – For baking the bread
- 1 Parchment Paper Sheet – To prevent sticking
- 1 Wire Rack – For cooling the bread
Ingredients
For the Dough:
- 3 ½ cups 420g Bread Flour
- 1 cup 100g Rolled Oats
- 1 ¼ cups 300ml Warm Water (about 110°F or 45°C)
- 2 ¼ teaspoons 1 packet Instant Yeast
- 2 tablespoons 30ml Honey
- 1 ½ teaspoons 9g Salt
- 1 tablespoon 15ml Olive Oil
For the Topping (Optional):
- 2 tablespoons 20g Rolled Oats (for sprinkling)
- 1 teaspoon 5ml Honey (for a glossy crust)
Instructions
Step 1: Activate the Yeast
- If using active dry yeast, mix it with warm water and 1 teaspoon of honey. Let sit for 5-10 minutes until foamy. If using instant yeast, proceed to the next step.
Step 2: Mix the Dough
- In a large bowl, combine bread flour, rolled oats, and salt.
- Add the yeast mixture (or instant yeast), honey, and olive oil.
- Mix until a shaggy dough forms.
Step 3: Knead and First Rise
- Transfer the dough to a lightly floured surface and knead for 8-10 minutes, until smooth and elastic.
- Place in a greased bowl, cover with a damp towel, and let it rise in a warm spot for 1-2 hours, until doubled in size.
Step 4: Shape the Dough and Second Rise
- Lightly punch down the dough, shape it into a round loaf, and place it on a parchment-lined surface.
- Cover and let it rise again for 30-45 minutes while preheating the Dutch oven.
Step 5: Preheat the Dutch Oven
- Place the Dutch oven with the lid inside the oven and preheat to 450°F (230°C) for 30 minutes.
Step 6: Bake the Bread
- Carefully remove the Dutch oven, place the dough (with parchment paper) inside, and cover with the lid.
- Bake for 30 minutes covered, then remove the lid and bake for an additional 10-15 minutes until golden brown.
Step 7: Cool and Serve
- Transfer to a wire rack and let cool for 20-30 minutes before slicing.
Notes
- For a Whole Wheat Version: Substitute 1 ½ cups of bread flour with whole wheat flour and add an extra 2 tablespoons of water.
- For a More Rustic Loaf: Let the dough ferment overnight in the fridge for enhanced flavor.
- For a Shinier Crust: Brush the bread with honey after baking.
- Storage: Keep in a paper bag or airtight container for up to 3 days at room temperature or freeze for up to 3 months.